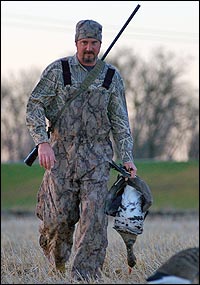
 About a month ago I received an e-mail from Paul Beyer, Pro Staff member for Avery Outdoors. Paul is planning his first elk hunt and like many first-time elk hunters, he has a million questions! Rather than create an exclusive electronic Q&A between Paul and myself, we decided to create an elk hunting feature for everyone to follow along and participate in!
Paul is going to get us started with a list of questions. Pro Staff members from Elk101.com will respond to the questions and the responses, along with the questions, will be posted here in this feature.
Let’s get started!
QUESTION #1 from PAUL:
All of my questions are directed in the pursuit of the gear I will take to the field this fall. Any and all suggestions are welcome and helpful. I have several bivy-type hunts planned and I’m picking up my packable gear this spring and summer. I mean packable/bivy type gear vs. basecamp or car camping gear. I have been reviewing pack lists from Cameron Hanes books, Sage Creek Forums, and David Longs Backcounty Muleys. All have been good and insightful but missing little things as the industry changes yearly and there may be a ‘better mouse trap’.
The weather during our season even in the high country is HOT! This affects everything from scent control and stalking through dry conditions to sleeping conditions: tent vs bivy. Not to mention the bugs and critters that will want to eat at me! Do you have a packing list you use in warm to hot conditions?
Clothing and scent control. Always play the wind and wash when able? What about clothing with blockers? Does that stuff get all mucked up with sweat and dirt leaving it useless? Where’s the best and cheapest place to buy the kind of gear the Elk101 staffers reccomend?
Response from Mark Cochran –
Packing list for hot weather bivy hunt:
- Eberlestock J34 Pack – I also hear good things about the Sitka Bivy 45. You need a big enough pack to accommodate all of your gear and some elk meat on the initial trip out.
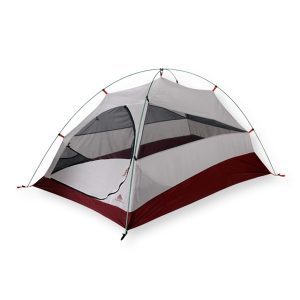
- Big Agnus Seedhouse single man tent – 3lbs 8oz. You need a light weight breathable tent. This is the best I have tried.
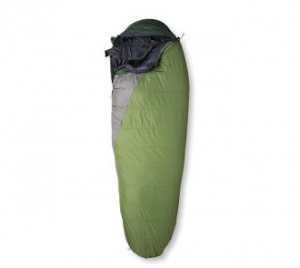
- Eureka silver city sleeping bag (warm weather only) 2.5 lbs
- Water purifier – I use a PUR “hiker” model. Very good but a little bulky.
- MSR butane/propane stove w/butane propane canister (1 canister will last 1 person for 3 or 4 days).
- Mountain house meals and protein bars – high carb/calorie items are necessary to keep energy levels up. Believe me you will still not come back heavier than when you went in.
- Sitka Ascent Pants – these are the best light weight pants I have ever used. Superb moisture wicking technology stays dry even in the sweatiest conditions. I have washed these out in the creek on a warm day and they will be dry within 1 hour.
- Sitka Core/Traverse shirt – Same features as Ascent pants.
- 2 extra t-shirts – It is nice to put on a clean shirt daily and in hot conditions as you mention you can wash and hang at the end of the day and let dry the following day and switch out.
- 1 extra pair of socks.
- 1 small pepper shaker full of pepper. In hot conditions flies and bees become a problem. Believe it or not sprinkling pepper on the meat will actually deter them. It does work!
- Game bags. I bone the meat out on the animals I take. See Corey’s video on the Gutless method for step by step instructions on taking care of your animal in the field.
Obviously the key is to be as light-weight and comfortable as possible. As far as scent control, I will carry a small bottle of scent stopper or other scent control spray. In my opinion, most scent suppressing clothing is meant for flat land and tree stand hunting. When you are hiking on a bivy type hunt and sweating you need good breathable type clothing to keep you as comfortable as possible. No matter what, you still must play the wind. Stay below them in the morning. As a general rule you have probably 2 hours in the morning until transition time in common weather. During transition time try to approach the animals side hill. By mid morning plan on being above them.
Plan on staying on a high ridgetop where you can listen at night. Some of my best scouting while in the backcountry is done at night with my ears. Put yourself in a location where you can listen to multiple drainages for bugling bulls. This will give you the opportunity to be close to the bulls by daylight. If you are staying in a creek bottom you limit yourself on the country you can listen to.
I look forward to hearing about your experience this fall. Let us know how you do. I would like to hear what worked well for you and what didn’t. Good Luck!
Response from Matt Brimmer –
1.) My packing list for Bivy style hunting is listed below. No real change for weather until it starts snowing a fair amount. Then I also use a 2 man 4 season tent. The base to my Bivy hunting is my Pack – Sitka Bivy 45 with Hydration system. However that will be changing to a Sitka Bivy 30 this summer.
- Bow, Arrows, Bino’s, Rangfinder with new battery.
- Release plus an extra release (you never know when you or a buddy will forget theirs).
- Water filter and Iodine Tabs
- Various freeze dried foods. Personally I like Mountain house, but watch the Sodium as it can lead to dehydration.
- Wilderness Athlete Bars and Drink mixes (Drink mixes will help with the Iodine Taste when you don’t have time to filter.)
- 1 knife in my pocket and an extra in my pack along with a small sharpening stone.
- 100 ft of Parachute cord
- Epi Pen
- Inhalers
- Advil and Benadryl
- ¾ roll TP
- 10 Unscented Baby wipes
- Small tube of tooth paste
- Headlamp with extra batteries
- Origo Pro Hunter watch (Elevation and Barometric Pressure readings – learn how to use the Barometer and it will tell you when a storm is brewing).
- Primos Silver XP bar soap along with Silver XP Deodorant.
- Lightweight wash cloth
- MSR Dragonfly Stove and Minimum fuel
- One small Titanium pot
- Extra Primos mouth reeds
- 1 extra broadhead with blades
- 3 lb Northface down Sleeping Bag (if car or trailer hunting I use a Butler Bag and cot).
- Cabelas or Sierra Designs Bivy bag along with a Kelty ultra lite wing (if not Bivy hunting I use a Wall tent or Camp Trailer).
- Lowa Tibet Boots (that are well broken in).
- 5 Alaskan Game Bags (4 for quarters and one for backstraps, tenderloins, and scraps). I do not prefer to bone out elk, but will when needed.
- 2 large Black Garbage Bags (one for dirty cloths and the other to keep my Pack from getting bloody on the inside).
- Canon Camera with extra Battery
- Firestarter flint and lighter
- Cell phone and/or Iridium Satellite Phone
- Sitka Clothing consisting of the following: (All of it is washed in Silver XP laundry soap prior to leaving the house)
- Core Shirts x 2
- Core Bottoms
- Ascent Pants but will be changing to the 2010 Mountain Pant
- 90% Jacket
- Traverse Shirt
- Storm Front Lite (Jacket and Pants)
- Gaitors
- Boxers x 2
- Extra pair of Marino Wool socks and extra pair of liners
- Nylon Gym shorts or cut offs for sitting around in. I also use them for the long pack in if the weather permits.
- A 100% Polyester short sleeve shirt for the pack in.
That should about do it for my packing list for Bivy style hunts. It seems like a lot, but really isn’t. When doing day hunts out of the Truck I switch to a Sitka 1400 and eliminate most of the above.
I always play the wind and wash my cloths and myself with Silver XP bar soap in streams when able. Concentrating on the odor gland areas! Even with good scent control you have to play the wind. I am not a fan of the Clothing with Charcoal as a blocking agent. Often times it is not breathable and causes you to sweat or overheat more. I am a proponent of Clothing with Silver in its material, such as Sitka’s Traverse Shirt and Pants. Do research on the bacteriostatic effects of silver and you will see why! I am not sure if the clothing gets mucked up from dirt and sweat, but I can tell you just wringing my Sitka clothing out in fresh water produces, some nice brown tinged water!
There are numerous places to get great deals on Backcountry gear. Elk101 offers great deals on Sitka Gear, Alaskan Game bags and various other Products. Sierra Trading Post has dang near everything for Bivy style gear and is a great site to check out on a regular basis to get great deals. Camofire.com has great deals on various camo patterns and clothing. Bowsite.com, Archery Talk.com and Sage Creek Outfitters.com has great classified ads to check out. Cabelas and the Cabelas Bargin Cave are both other great places to get gear. If you are ever in Reno, NV there are many great stores to check out that have great deals. Cabelas, Sportsman’s Warehouse, Scheel’s, and Sierra Trading Posts all have stores in Reno that you can often times find great prices on the gear you will need.
I hope my answers to your questions are helpful. If you need more in-depth answers feel free to ask away. That is what we are here for! Personally the one key to an enjoyable Bivy hunt is this: “Be prepared for any and every form of weather pattern in the back country. You never know when it can change.”
QUESTION #2 from PAUL:
 Just watching some of the videos over and wondering “What’s your set up?” I’m still out on broadhead choice and arrow weight. Now I’m shooting an Alphamax 32 (Hoyt) at 70 lbs. 29.5 draw with Easton Axis Nano with 100 grain head (total 410 grain arrow). So whats your rig staffers and tell all about the missile!!
RESPONSE from Elk101.com PRO STAFF:
Response from Russ Meyer –
First of all I think you’ve made a great choice in your missile launcher. I personally, am a Hoyt freak. I’ve been shooting Hoyt since 1992 and I’ve never had one fail me in any situation. I’ve been fortunate to harvest several big game animals with my Hoyt bows. Not that I’m bragging, I’m just letting you know that I’ve been around the block when it comes to testing equipment.
The first thing I would consider when it comes to elk hunting is the foot-pounds of energy that your set up is producing. Based on your rig I would guess that your arrow is flying around 295 ft. per. second. (if not, adjust accordingly) To find your kinetic energy you multiply (velocity times velocity times arrow weight divided by 450,240). So, I would guess your set up is as follows: 295ft.per second x 295ft.per second x 410 grains / 450,240 = 79.247 lbs. of kinetic energy. I personally like anything over 65 lbs. so you’re in great shape.
I’m a little old school so I’m still shooting the more traditional style Hoyt 38 pro @ 70 lbs., although I’m anxiously waiting for my new Maxxis 35. My arrow of choice is the Beman Black Max 340. My arrow is 28 inches, has a 4-inch wrap, and is fletched with three Blazer veins. I prefer a little heavier arrow @ 437 grains. My energy is as follows: 268 x 268 x 437 / 450240= 69.71ft.lbs. Unfortunately they don’t make the Black Max anymore. I have two dozen left so I’m extra careful on picking my shots. When I run out of them I will shoot either the Beman Realtree 340 or the Axis 340.
I, like everyone, have a pretty strong opinion of my choice of broad heads. There are a lot of good heads out there. I’ve shot a bunch of them and my choice is the 100 gr. G5 Striker. They shoot wonderfully out of my set up and I don’t think I’ve ever had more confidence in a hunting arrow. I’ve shot a number of critters with them and they have performed flawlessly. I think more important than what head you shoot is that you find the head that flies the best out of your set up and gives you the most confidence so when you pull back on that big bull you know where the arrow will impact your target. Confidence is everything!
It sounds to me like you’re on the right path. Find the head that gives you that mental edge and hit the hills. Good luck in all your adventures and God bless.
QUESTION #3 from PAUL:
A recent article in EBJ by John Dudley reinforced my theories on training and shooting, in training for this up coming season. The best training for climbing is climbing; the best training for shooting is shooting. The next best thing is to put your self through any and all conditions that would practically and impractically recreate situations one might experience in the hunt. Some people may think that after completing a tabata or HIIT workout with sandbags (40 lb) in my ruck that shooting would be the last thing I would want to do. I have begun implementing some High Intensity Interval Training to my cardio and weights. What will this benefit? I believe that this simulates running up a steep slope or ridge and setting up for an ambush and making my heart rate steady and calm for a well placed shot. What are your opinions and work outs?
Response from Tony Mudd –
It’s obvious you are taking this very serious and have been doing your homework. My hat’s off to you. I moved to Nevada 22 years ago and every year since then my life has centered around bow hunting and keeping in shape for one reason mainly – to get me around the mountains as easily as possible which helps make the hunts that much more enjoyable. I can’t agree more with you and John Dudley. “The best training for climbing is climbing, and the best for shooting is shooting.” As David Burdette wrote in Elk101.com Physical Conditioning: Task Specific Training.
The human body is amazing, but doing the same exercise day after day will at some point create a plateau in your conditioning, and keep you from your fitness goals. The benefits of varying your workouts, HIIT, Tabata, hiking, weighted hiking, running, biking, and strength training will keeping the body guessing and the muscles firing in different ways which will take your fitness to the next level. Endurance, strength and mental toughness are you’re best friends when chasing elk in the mountains. So your training should cover all three.
Muscle is what supports the bodies skeletal system, especially the joints, and you need to keep the muscle on your body balanced and strong. So for me in the off season strength training is my focus, with a few weighted climbs thrown in. As the season gets closer I concentrate more on endurance, while maintaining as much strength as possible. Nutrition is a top priority and key to this.
One of my favorite workouts consist of walking, running, kneeling and shooting. I’ll have 5 or 6 arrows with rubber blunts or judo points in my quiver. Start by walking up a hill, pause, then run (vary the distance) stop kneel pick a spot on a sage brush, draw and hold on a spot, concentrating on that spot, sometimes I let down, other times I let fly, depending how badly my breathing and heart beating has me shaking. Trying to hold steady under these conditions is extremely difficult. I’ll repeat this several times, walk, run, kneel or stand, draw hold or shot, then off again. Over time you’ll find you’ll get steadier. All this training will come together and could one day pay huge dividends on the mountain when that bull of a life time is screaming a short 15 yards away.
Best of luck on your training and elk hunt this fall. Keep us posted.
QUESTION #4 from PAUL:
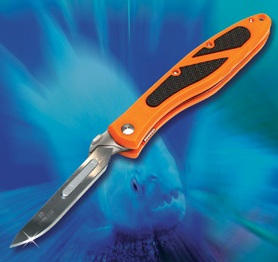
I’ve been looking at all the videos I can and playing them over and over with me in the hot seat trying to visualize each experience. The gutless video was informational and I was wondering if the knife you were using was sharp enough due to the effort in cutting fascia or is an elk’s skin and stuff that tough? Which leads me into gutting kits and knives. I have taken a fancy to the new Havalon Piranta scalpel knife. Interchangeable blades and ounces to its weight. What do you think? Is this a better way to go or does one need a butchering kit to bone out an elk? I have been watching Outdoor Edge’s Quarter and De-Bone video and I think I could do it with one knife and a gut hook. For years I have been using a 4inch filet knife that is razor sharp on ducks geese and turkey. Popping joints and general anatomy is pretty easy for me with my little filet knife but now I’m talking elk!
Response from Mark Cochran –
I have seen the Havalon Piranta scalpel knife and it seems like a great choice for boning or working up a big game animal. I always carry a small taxidermy scalpel with an extra blade and a gerber gator hunting knife. I use the scalpel to cape the animal or to do the work where precision is necessary. The hunting knife does the rest. I also carry a small sharpening stone and probably sharpen my hunting knife 2 or 3 times while working up an animal. One knife will do the job especially when you have means to sharpen or change out the blades.
I have been boning out elk for years and rarely use more than one knife. The hair on an elk is the hardest on the blades. Once you get inside the hide, work your blade from the inside out to avoid cutting a lot of hair. This will make your blade last longer. I am sure the Havalon Piranta will be all the knife you need. Good Luck!
Response from Jody Cyr –
Kinda funny when I read your response because I use the exact same knives you’re speaking of. I’ve been using that Havalon for years and originally bought it because my taxidermist kept telling me how good it was for caping heads. I soon realized how good it is to use 90% of the time. In my opinion, the blades are a little short for getting into those hip joint, but like you said, if you know exactly where they are you can get away with it.
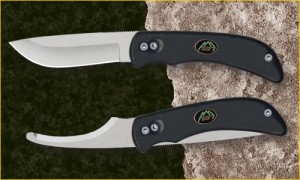
The other knife I pack is the Outdoor Edge Swingblade. I use this for cutting through the big muscles and the thicker hide of behind the antlers and down the back of the neck. I also bought the Outdoor Edge pack of knives in the green hard case (60.00ish bucks). I use it a lot for processing meat at home but never take it into the field. You could get away with just having the havalon in the field, but I would suggest having another good knive with a little more rigidness to help get quarters off.
Last thing, I know this is probably something you’ve already heard, but be CAREFUL with that Havalon knife. Those things will leave a mark on ya. Take care and good luck hunting..
QUESTION #5 from PAUL:
OK guys here’s another one. I would conisiter myself a pretty good turkey caller and user of the diaphragm call. Will this help me shorten the learning curve when trying to learn elk calling with the diaphragm? I am leaning towards Bugling Bull game calls as they seem to sound very realistic. In researching I stumbled across this guy “Elknut”. Has anyone checked out Elknuts Playbook or videos? They have a lot of ‘how to’ videos and calling info. What do you think?
Response from David Burdette –
I think there are two things played the most important roles in my ability to quickly adapt to calling elk. One was having the amount of hunting experience that I got while living on a rural farm in WV and the other was my experience at using a diaphragm call to call turkeys. As a matter of fact I made that quote to the outdoor sports editor in Charleston WV and he wrote it in an article back in the early 90’s. Based on my experience, I am sure your learning curve for elk will be influenced by your turkey calling skills, as well as your basic hunting instincts.
Bugling Bull game calls are great calls and if that is what you like the sound of, use it. Confidence is everything in this game. So if it sounds good to you, that is the one to use.
Response from Corey Jacobsen –
The fact that you have experience with a diaphragm call will no-doubt help you as you work through the elk diaphragm learning curve. You can already make noise with a diaphragm, so you’re part-way there. Learning to control the air flow and tongue pressure will be the critical step for you, and will differ from what you have been doing with a turkey call.

I am obviously partial to the Bugling Bull calls, but I have tried all of them and will say that in my opinion, Bugling Bull elk diaphragms are the easiest to use out of the package and seem to be the most consistent over time. I especially like the brown “Raging Bull” diaphragm.
“Elknut”, aka Paul Medel, is a great guy with an encyclopedia of elk hunting knowledge! However, our approach at Elk101.com varies quite a bit from Paul’s approach. Paul teaches his interpretation of basically every sound an elk makes, what it means, and what you should do in response to each sound. He also has a playbook that outlines these sounds and situations. At Elk101.com, our motto is “Keep it Simple.” In our seminars and classes we teach the 3 basic elk sounds that we feel are needed to consistantly call in elk…a location bugle, a simple cow call, and a challenge bugle. If you can master, or at least learn, these three calls, and when to apply them, you can call in elk consistantly. There are literally hundreds of things that can, and often time do, go wrong when elk hunting. Being able to keep on top of all of them is hard! Having a simple approach for calling is not only easier to learn and apply, but it is equally effective. I would certainly suggest learning as much as you can from Elknut, but don’t overwhelm yourself by making elk calling too difficult. Keep it simple. Focus your efforts more on getting in shape, learning wind currents, learning elk habits, etc. You don’t have to be a great elk caller to be a great elk hunter. But if you aren’t in shape, or if an elk smells you, the outcome of the hunt will not be in your favor.
Response from Dirk Durham –
Becoming comfortable with a diaphragm-style elk call is a large hurdle for many newcomers to elk hunting. Since you’ve stated that your proficient with a turkey reed, you’re already prepared to master the elk reed.
The first thing you must do is indulge yourself with lots of real elk vocalizations, whether its movies or recordings, you must learn what elk sound like. I have sampled most of the name brand elk calls on the market and I prefer Bugling Bull game calls. For me, they sound very authentic and are consistent every time I blow one. Several times I have went through the entire elk season with only two reeds, and then used the same two reeds to compete at the elk calling world championships. If cared for properly they will last. Bugling Bull also has amazing grunt tubes to complement their reeds, and an instructional video or two.
Learning to use elk calls is not an overnight deal. It takes commitment and hard work. You have to practice until your head hurts and all your friends and family hate your guts, then and only then, you’re going to be on the right track. It just like good woodsmanship, you cant buy it in a box, it comes from paying your dues and not giving up. Any elk hunter who does not learn how to use elk reeds is severely limiting themselves by not having hands free calling. Many times in the elk woods, hands free calling has saved the hunt, and with out mastering elk reeds I know my personal success would have been hindered. So get some calls and let it rip!
QUESTION #6 from PAUL:
Guys! I have been pouring over all kinds of magazines, posts, online stores and gear reviews… about boots. I know it’s a personal fit and preference but you guys have probably tried it all. The boots I have been using for the last few years are a pair of army jungle boots in the soft flat terrain and a pair of Raichle alpine type boots I bought in Berchtesgaden Germany at the sports shoppe in the General Walker Hotel. The Hotel and shoppe are gone now but the boots remain. I like their support and rigidity.
I like a supportive boot in the steep thick stuff and I feel they support my ankles and knees better. Did I mention I had minor knee surgery last year. Don’t ask me when, I just know I suffered through a fabulous turkey season and had to gimp out deer season. I am leaning toward (tried on and like) Kenetrek in the non-insulated. What are you guys using and why the personal choice?
Responses from Elk101.com Pro Staff –
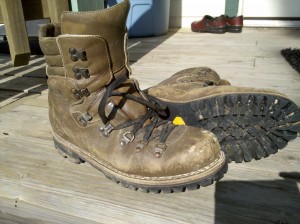
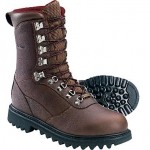 Mark Cochran: Great question and like you said it is personal preference, but you want a good solid boot that does not break the bank. I was a forester for 8 years, so I spent on average, between work and play, 5 days a week in boots putting them to the test. The boot I keep going back to is the Cabelas Iron Ridge all leather hunting boot. They are $100 and last as long as any $250 boot I have tried. They are goretex and remain waterproof. One other thing that helped was applying free sole (kind of like shoe goo) to all of the seams of the boot. This kept them together longer. Cabelas Iron Ridge are my boot of choice.
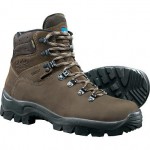 David Burdette: When I was guiding and in the woods everyday for 6 weeks at a time I used the cheaper Cabela’s hiking boots and usually wore one out per week. But after my football injuries came back and my surgeries started breaking down in my ankles I needed more support. I have found the Meindl 7″ hiker to be a good supportive boot. It is a little harsh on real rocky trails. I am going to try the 10″ boot on my next purchase but the higher boot usually rubs my calf. I also keep a few pairs of lighter, more flexible boots around for those light evening hikes or sore feet days. Hi Tec will fit this bill. Not super supportive but very comfortable.
Jody Cyr: I use two different pairs of boots. When it’s cold or really rugged terrain I often grab my Kenetrek non-insulated boots. Very light, comfortable, and great support. However, for most of my elk hunting in the warmer weather I generally use just a hiking style boot made by Lowa. Very comfortable and a little quieter then the Kenetrek boots. Lots of good options out there but you can’t go wrong with the Kenetrek’s for an all around style of boot.
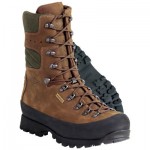 Russ Meyer: In my opinion, well performing boots are at the top of the list when it comes to the quality of a hunt. Your success as well can directly relate to boot performance. If your feet are sore and blistered it will reduce your ability to go that extra mile. In the early years my boots consisted of what ever I thought I could afford at the time. I later discovered it was worth paying a little extra for the water-proof Danner boots. It made a huge difference having dry feet. I used Danners for many years, but I still seemed to be buying a new pair every year. I also seemed to be looking down too much of the time as not to twist an ankle. It wasn’t until a few years ago that I was slapped in the face with the reality of how a truly quality boot could perform. I had been researching boots when I came across some info about Kenetrek. I later purchased some and haven’t looked back. In a perfect world you would have boots specific for every situation. I don’t live in a perfect world so my boot of choice is the Kenetrek Mountain Extreme. I own an un-insulated pair and a 400 gram insulated pair for late season and I have never been happier. I backpack in a fair bit and am most impressed with the support, yet they still work well while stalking. I highly recommend finding that quality boot that will improve your experience and success. Kenetrek is a great choice.
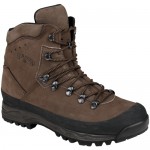 Matt Brimmer: Having a 13 B for a foot size was always a pain until my first visit to Schnees. They fit me with a Lowa Tibet and I have been wearing them ever since. I think I am on my 5th pair in 9 years. They fit like a glove, especially when a Super Feet insole is added. The Tibet offers my ankles extra support for the steep stuff and are flexible enough for the flat stuff. I also always pack a pair of Schnees pack boots in the truck when I am hunting in the “Gumbo” of Eastern Montana and Wyoming. At the RMEF’s Elk Camp this year the boy’s at Schnees fit me with their new Schnees Wilderness. I look forward to getting to break them in the next few weeks as a back up pair to my Tibet’s.
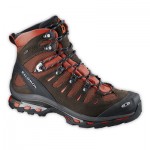 Tony Mudd: I elk hunt in boots like the Salomon Quest 4D GTX Hiking Boot or similar, and once the animal’s on the ground I’ll switch to a heavier boot like the Meindl Alaska Hunter for packing.
Donnie Drake: Currently I’m wearing the Danner Pronghorn GTX hunting boots. I have one pair without insulation for early season and another pair with 400g insulation for later cold weather hunts. Weighing only 49oz (57oz insulated) they are a great lightweight and very comfortable boot. With that being said they do wear out pretty fast and the waterproof claim is unjustified, your feet will get wet walking in the early morning dew covered terrain elk call home, even after several waterproofing treatments. This year I’m planning on giving the Zamberlans a try, either the 518 Dakota GT, 636 Baffin GT, or the 996 Vioz GT.
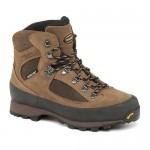 Corey Jacbsen: My current boot is the Danner Light II. It has served me well for many years and I usually get 2+ years of good use out of a pair. They are very comfortable and light and have great support. However, I found a new boot at the RMEF Show this spring that will be on my feet this fall…the Dakota 518 by Zamberlan. Incredibly comfortable, waterproof, light…everything I look for in a boot. My only complaint about the Danner’s was the fact that they would get wet when hiking in wet grass or crossing creeks…the Zamberlan’s don’t.
You’ll notice there is a lot of variety when it comes to good hunting boots. Find one that fits you well and that you have confidence in…like Russ said, if your feet are blistered and sore, you won’t feel like pushing on to chase elk!
QUESTION #7 from PAUL:
With all the unsettled weather we have been having as of late and Mt. storms (we are having one right now on my hunting areas I can see from my front yard!) a question arose in my mind pertaining to these storms. In some of the reading I have been doing the authors button down and find shelter for a storm. Is this meaning a “real gully washer” of a storm or just “a rain”? Folks around here call in sick for work and go hunting if there’s a summer storm brewing. Is the backcountry that much different or are they not packing rain gear? What gives?
Response from Mark Cochran –
I guess this defines the saying “Prepare for the worst, Hope for the best.” I always have my raingear available. Good lightweight and packable rain gear is a must in the backcountry. I have seen some pretty bad storms and have taken cover, but most of the time it is a snow storm where you may need to push forward and drop in elevation. Sometimes we have heavy fog for days, which takes getting your bearings straight. In this case, if you are not ultimately familiar with the country you are going to hunt, carry a good GPS. Even in a heavy snow storm it can be tough to tell where you are or you can miss the trail you are trying to find. You may also want a good radio with a weather station; this way you know of severe weather warnings in advance. If severe weather is headed your way, you can be prepared by finding a good spot for cover or by getting off the mountain to the safety of your vehicle.
QUESTION #8 from PAUL:
 Sleeping pads… Z lite type or Thermarest inflatable comfort? Where does weight cross comfort? Pro’s and cons? I’m checking out these shelters www.tarptent.com . They are amazingly light and have some cool features in a shelter/bivy. What do you think?
Response from Matt Brimmer –
Personally, I take comfort over a few ounces when it comes to my shelter and sleeping pad. During Bivy style hunts your body can, and will, take large amounts of stress and abuse, both mentally and physically. One of the best ways to recover from both is quality sleep. Sometimes you will be so exhausted and beat down you will just fall asleep easily, only to awake in 2-3 hours with a small rock digging into your spine.
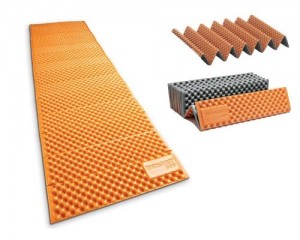
I have used both the self inflating and Z-Lite pads from Thermarest. Two years ago I switched to a Z-lite and kept it full length. If you want to save a few ounces you can cut one of the sections off. The reason I switched was because of a puncture to my self inflating the year prior. With no patch kit (shame on me) the puncture turned my sleeping pad into a Bivy Foot print.

I used a Kelty wing tarp as a shelter when needed for years. I purchased mine from Cabelas many years ago so I am sure the newer ones are a bit lighter. The ones you are looking at appear to be a great shelter. Unfortunately they would be cost prohibitive to me and many others. I prefer the very simple design of the Kelty Noah’s Tarp.
Response from Donnie Drake –
Paul, I’d love to give opinion of the pads/shelter you mention but I haven’t tried either, but here’s what I have used for my sleeping gear when headed out for a bivy hunt.

I picked up the Big Agnes inflatable sleeping pad before season last season and found it was easy to inflate/deflate, took up very little space ( about 6″x4″x1″ all folded up) and was very comfortable. The first night I blew it up all the way and found it to be a little to stiff so I just let out some air till it just molded to me. After 4 nights on the ground, 3 nights in the back of the truck, and 3 nights on the floor of the cabin with it I was very pleased.
For my overnight shelter I prefer a tent over a bivouac mainly for weather issues. If a storm comes in and rains for a period of time I like to be able to have a waterproof shelter for myself and my gear to wait out the storm. This tent from Kelty worked great last year and it’s a great price. My son and I spent two nights in it preseason and it worked great, he’s a bit smaller than me and we fit nicely. With all our gear able to be tucked away in the vestibule during a light rain everything stayed dry. With two guys sized like Corey and myself you can both fit but you will be limited on space sleeping but it beats having to pack the weight of two shelters.
For the cost ($260) and weight (just over 7.5 lbs) I’m very happy with the set up and will be using it again this season. I was able to stuff the tent, pad, and sleeping bag all in the stuff sac that came with the sleeping bag, which made it nice for strapping on the Sitka Bivy 45.
QUESTION #9 from CHRIS BURDEN:
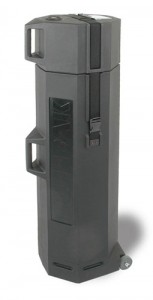
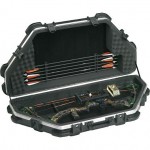 Do you all recommend a good travel case for the bow? I have several friends asking the same question that need to travel to hunt elk. I had an inexpensive case that I traveled with and the airline badly hurt the bow during the travel so I want to invest in something that works.
Response from Tony Mudd –
It’s a good question! Bow hunters are always searching for a better way to travel with their bows! In a typical year I’ll fly 6 or more times with my bows. Three years ago I started using a bow case made by TuffPak (http://www.huntersheadquarters.net/Tuffpak_s/20.htm) and LOVE IT! It allows me to carry two bows and plenty of clothes. It looks like a travel hard case for golf clubs, so very seldom do I get asked what’s inside. With that said I have also used several SKB bow cases over the years with excellent results.
QUESTION #10 from PAUL:
Guys, after a hard day chasing elk and setting camp for the night what is your favorite freeze dried or packed in meal? Remember this is pack in so steak and beer, while it may be the favorite, is not the usual pack in foods!
What is your comfort thing. That little extra thing you feel is worth packing its weight around in the high country?
Response from Corey Jacobsen –
Paul, I am a HUGE fan of the Mountain House brand meals. I pack in a 2-serving meal for each night I am packed in and I always get full and have energy and strength the next day. They are easy to cook (just add hot water), taste great (lots of variety), and are lightweight for packing. 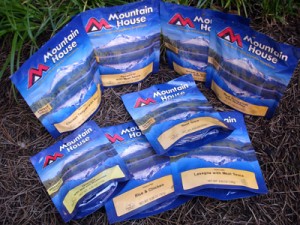 I’ve tried other brands (including MRE’s, which I can’t stand) and Mountain House gets my vote. In fact, we usually eat Mountain House’s for dinner, even if we are hunting out of a truck camp or base camp. The best place I’ve found online to purchase them is through Linton Outdoors (www.lintonoutdoors.com). I also really like the Wilderness Athlete bars for lunch/snacks. They are lightweight and pack a lot of nutrition and energy, with pretty good flavor.
As far as comfort items…I always pack a sleeping pad. Like Matt mentioned in one of his responses earlier, a good night’s rest is vital for being able to get up and go hard again the next day. It is pretty lightweight and easy to pack, but when it comes to evaluating a bivy pack and looking at items that can be left behind, a sleeping pad is sometimes high on the list for many hunters. I’d strongly suggest making sure you don’t leave it behind. I also pack a very small, compressable pillow. It helps ensure I don’t wake up with a sore neck and/or headache.
Response from Donnie Drake –
You cant go wrong with Mountain House dinners, they are lightweight, packed with plenty of calories, very tasty and super easy to prepare. After a long evening hunt I always look forward to pouring that water in the bag and “cooking” up a great meal. Add a Jetboil to your pack for heating up the water and you will have your water boiling in two minutes. A typical 100g Jetpower canister used with the Jetboil PCS system will boil 12 liters of water so you can heat around 20 meals per canister. A new alternative to a fuel based system that Mountain House has come up with is the Mountain Oven. It’s a flameless heating kit similar to what is used in a MRE and you can heat up 5 meals per oven.
As far as a comfort item that I cant go without on a bivy hunt, I cant really think of one other than using a tent over a bivysac. Guess I just like the comfort of having a roof over my head.
QUESTION #11 from DAVID:
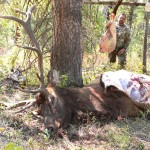 How do guys keep their meat that is left behind cool without spoiling while packing a load to the truck or camp or what ever? For example, I will be doing a DIY bivy-style hunt this year and will be back in there between 6 and 9 miles. There are 3 creeks with cold water nearby, too.
Response from Mark Cochran –
There are several things you can do to prevent the meat from spoiling in warmer temps. I have had to leave meat overnight on some 60 degree nights. So here is my 2 cents:
Completely debone the animal as quick as you can– just quartering the animal and hanging with bone in tends to spoil much quicker than boned out meat. Remember the spoiling process begins as soon as the animal expires so the quicker you work to get the meat cooled down the longer it will last.
- Limit the amount of meat you put in each game bag – this allows the air to access and cool the meat quicker (pack an extra game bag).
- You mentioned there is some cold water in the area – hanging the meat in the cooler draws would be a good idea. Also hang on the south side of the creek draws to limit exposure to the sun.
- Sprinkle some pepper over the meat bags to help keep the bees and flies away – this will keep the meat cleaner. I have had blow flies leave a mess before – they can actually force their eggs through the holes in some game bags.
If you keep these tips in mind your meat should last as long as it takes you to get it out. Good luck on your DIY elk hunt this fall. It is hard work, but well worth the effort.
Response from Matt Brimmer –
It is great you recognize you may not be able to get all the meat of an Elk out in one trip. Even by boning the meat out it will still take 2-3 trips when you consider your gear. Of course this is assuming you will be hunting alone. If you are with a hunting partner it is very possible to get a boned out elk in one trip, if you’re willing to pack extra heavy loads. I have painful knees when I stack on too much weight so most of the time, even with a hunting partner, we will pack the meat and gear out in two trips. I would rather walk extra miles than risk a major knee injury.
For me it doesn’t matter how far I am in when it comes to the care of my game meat. Initially, I quarter the Elk using the gutless method and cover the quarters with pepper (keeps the flies off) and Alaskan Game Bags (AGB) keeping as much contaminate (dirt, hair, etc) off of the meat as possible. 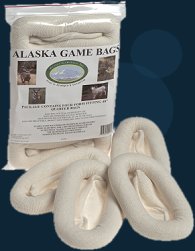 I also have a fifth game bag for Back straps, Tenderloins, and scrap meat. After each quarter is bagged I hang it in a well shaded area to get it cooled down as quickly as possible. If the weather is hot with warm nighttime temperatures and there is a Creek or Deep drainage within ½ mile or so I will pack each quarter to an area that is easily accessible and re-hang the quarters in the shade. Typically creek drainages are 8-10 degrees cooler in the shade. I do not place the elk quarters in water as that will slow down the “Dry Aging” process and potentially add bad bacteria or parasites such as girardia and tape worms to the meat.
When all of the quarters, meat, and skull/antlers are in one easily accessible and cool location I will compress my pack, with gear inside as much as possible. After my gear is compressed up towards the top of the pack, I than take a front quarter with neck meat attached and bone it out. I add the boned out front quarter and neck meat to the back strap’s, tenderloins, and scrap meats and place it all in the same AGB. Once all of that meat is in the same AGB I place it into a large contractors black plastic bag and place the bag of meat in the lowest possible position in my pack. I than attach the skull/antlers to the outside of the pack and hit the trail.
Response from Corey Jacobsen –
Just wanted to add a little bit to Mark and Matt’s comments. I like to leave the bone in unless I am a long ways from the truck (3+ miles). There are 2 reasons for this, and 2 ways to overcome those reasons. First, leaving the bone in gives the meat rigidity, which can make it easier to handle and pack. A front leg/shoulder bone or a rear leg bone are both less than 4-5 pounds, so it isn’t a lot of extra weight to leave it in.
The other reason I don’t usually bone the quarters is that if you get a big pile of boned meat laying on top of each other, the meat in the center isn’t going to cool as quickly and you run a risk of spoiling. As Mark mentioned though, keep the piles smaller and let it cool before loading it into one game bag for the trip out and you won’t have to worry about it spoiling.
I haven’t personally used a black plastic garbage bag as Matt mentioned, but I would just caution against the amount of heat that it can generate and trap. As he mentioned, be sure the meat is cooled off before placing it in a garbage bag. I would imagine the reason for the garbage bag is to keep the inside of the bivy pack clean…not a bad idea. Just make sure the meat is completely cool.
And never put your meat in a creek to cool. Hang it in the shade alongside a creek, but never in the creek. We have left meat hanging in the shade near a stream by camp for 3+ days in 80 degree heat (much cooler in the shade along the creek) and have never had any issues. The initial cooling is the most important part…once it cools, it will keep well in the shade for a couple of days. Be absolutely sure you are using a quality game bag that will keep the flies out, and make sure you don’t allow any flies to get into the game bags before you tie them off. A 4 pack of Alaska Game Bags runs about $10 and they will work great. Don’t skimp and go for the $1 game bags…you’ll regret it.
QUESTION #12 from PAUL:
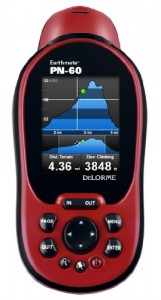 Guys, I’m looking for a good GPS unit. Some are basic and easy to use but lacking in features or creature comforts. Others are overkill and still others are…well you get the picture. I am versed with a GPS and looking for a new unit. Leave price out. What units are you using and what units do you wish you had? Don’t worry I am well experienced with map, compass, and protractor, and know the importance of taking them with. Anyone know about the new delorme pn 60?
Response from Matt Brimmer –
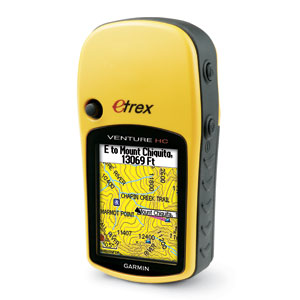 I personally use the cheap Yellow Garmin E-trex. I prefer simple operation and usability in my GPS and use it only to get to and from waypoints. (i.e. Wallows, Bedding areas, trails, Truck, Camp, etc). I rely on custom made topo maps from “Off The Beaten Path Maps” for terrain navigation, trails, etc.
In the very near future I will be purchasing two Garmin Rino 520 Hcx not only for there ease of function, but also for there communication, NOAA, and peer to peer feature’s. I could care less about their mapping ability. I would rather pack one unit (GPS/Radio) vs. two (GPS and Radio).
My wife and daughter will use one of them. I will also purchase mapping software so I can start building my own maps with waypoints on it. I just can’t let go of my 7.5 minute Topo Maps. There is just something about using a map!
QUESTION #13 from DAVID:
Follow up to Question #11 – Once the meat is back at camp or truck, can you elaborate a little on storing your meat in the coolers for transport? Will the water from the ice affect the meat during transport? Can the meat be touching in the cooler or should it be seperated? also how many ice chests and how big should they be for an animal this size? Thanks again, David
Response from Corey Jacobsen –
We are fortunate in most of the areas we hunt in that once we get the meat back to camp and cooled in the shade along a creek, it will stay cool for 2-3 days with no issues. We typically don’t have to worry about packing a truck loaded down with ice-filled coolers to place the meat in once we get to camp. We’ll let it hang in the shade until we are able to get it into town and to the butchers.
If we are traveling out of state or longer distances, I like to use dry ice in the coolers. You don’t have to worry about the mess of bloody water from melting ice or keeping the meat in plastic bags to keep the water off it. One word of caution though…dry ice will cause “freezer burn” on the meat if it touches it, so I like to lay the dry ice in the bottom of the cooler, then a layer of cardboard, then the meat.
Once the meat has cooled from its initial hanging, you won’t need to worry as much about keeping it separated inside the coolers. With dry ice, or regular ice for that matter, a good cooler will keep the meat cool even if it is boned out and stacked inside the cooler.
As far as how many coolers and how big…I can fit one hind quarter and one front shoulder (with bone in) into my Igloo 100 quart cooler with dry ice. Two of those bigger coolers plus a 64 quart cooler will fit the entire elk. You could get away with 2 coolers if you bone the meat out.
QUESTION #14 from PAUL:
Do you guys prefer to paint your face, wear a cover or mask or just go without? It would seem that in close quarters an elk would pick your face up out of the woods pretty easily. When do you put it on in the stalk or just have it on always? I know from turkey hunting and duck hunting that your face and hands shine like a beacon if theyre sweaty and the sun hits them.
Response from Matt Brimmer –
I have tried the paint and will never do that again. Especially on a backcountry hunt! I missed an opportunity at a 320+ bull here in OR about 8 years ago due to the mask covering up just enough of my sight picture. It slid just enough so I couldn’t see out of my peep or my 20 and 30 yard pins. He was at 35. When the tight fit ones came out I tried to practice with one as much as possible but felt I didn’t have a solid anchor point. So no go on those. I do still pack a spandex style one with me to use when I am a caller. What I have found that works for me is to let my facial hair start growing out about a week before I leave to camp.
Elk don’t see the same color patterns as Turkey and Waterfowl. I have found that by controlling your movement and using your surroundings, especially your backdrop to break up your outline is far more important than covering your face.
Response from Tony Mudd –
Years ago when I learned to hunt elk there was NO internet, and only two videos on the market. One by Larry D. Jones and Dwight Schuh, and the other by Pete Shepley and Jerry Morrison. Larry and Dwight have for the most part always painted their faces, and Pete and Jerry did not. The first few years I hunted elk I used camo face paint, but over the years that quickly faded. No pun intended! For me it just did not seam to make a difference one way or another. I typically hunt elk by myself, which means I’m calling, and moving much for than if I was just set up with a caller behind me. What it boils down to is moving and calling at the right times.
Response from David Burdette –
I agree under certain circumstances that your face may shine. I always keep my face hidden behind my bow even while drawing. I sweat profusely so paint will not stay on and facemask restrict my vision too much. It also just something else to carry and keep track of. Just try breaking your face up by putting your nose on the string and hide behind it until you draw. I worry about his nose more than his eyes.
QUESTION #15 from PAUL:
You might shoot like a ninja assasin at 60 and 70 yards in practice but where do you draw the ethical shot line in an elk hunting situation?
Response from Matt Brimmer –
There is a great article written by Darrin Cooper in the last issue of EBJ in regards to effective shooting range. Every archer should know there effective range under different conditions such as, shooting up or down hill, side hill shots, shooting with a cross wind, and especially shooting with an accelerated heart rate. Personally I keep my Elk shots under 60 yards. Preferably 40 and under! An elk taking a half of step forward as you touch your release will change the arrows point of impact from behind the shoulder to dead center guts. It’s just not worth it to me to take that chance.
Response from Tony Mudd –
I personally don’t have a set number for ethical shot distance. Would I take a 60 or 70 yard shot at an elk? Doubtful, but under perfect conditions possibly. Every situation, set up is different. One day I may take a 50 yard shot and not think twice about it because everything was perfect, but the next day the lighting may be bad, and/or the wind blowing, and I wouldn’t take a 40 yard shoot. Again everyone is different, and every situation is varied. Always take ethical shots period, it’s not for someone else to decide.
Response from David Burdette –
When it comes to shooting distance my advice is always stay inside what you are confident at. This is definitely dependent on your equipment and your abilities, but you must know your limitations and hunt and shoot accordingly. A 40 yard shot may not be ethical to some folks based upon equipment and ability, so just know your limits and stick to them under any circumstance.
QUESTION #16 from PAUL:
Guys,
I’m wrapping up most of my lists and adding a few items I learned from the Elk 101 seminar. So the next questions are:
How much do you use your head lamp/ light and can you recommend a few? How much lumens of light vs.. weight?
How are you keeping bears out of your tent and packs (other than a bear tag). Hanging packs or food bags in trees?
I have read that a lot of you use 1 liter bottles for water but it is my experience with them that they are noisy and the water sloshes around if not completely drank/drunk. I like the idea but the hydration system seems quieter and practical. Ideas?
Response from Donnie Drake –
 I just finished loading my headlamp with new batteries last night and clipped it into the day pack. I like one from Cabela’s called the ULH LED Clip Light with white LED’s. It weighs less than 1 oz and puts out 12 lumens. I like just clipping it to the bill of my hat for those times in the dark back at camp heating up water and getting everything ready for the next morning. I usually just leave it on the hat since I will be putting it right back on to head out again in the morning darkness. For $10 you can’t beat the ease of use, plus one set of batteries will last all season. When not in use, I clip it to the strap on the inside of the Ascent 14 that is made to hold a water bladder and makes it easy to find in the dark.
I haven’t ever had a problem with the bears since most all my food is freeze dried or packaged and isn’t going to emanate odors. I don’t carry jerky or unpackaged items since the pack is going to be with me and I want to try to eliminate anything in the pack that’s going to give off any smells…if a bear can smell it so can an elk! For the used Mountain House bags I just carry two 1 gallon Ziploc’s and double bag them with any other trash.
Response from Matt Brimmer –
I personally carry two different headlamps in my pack. One is a Petzl Tikka that I use for just about everything – from hanging out in camp to cooking it is great. The second is a Cabelas XPG. The XPG is definitely heavier than some on the market by a few ounces, however it is very bright with good battery life. I use the XPG when hiking in rough or “Black Dark” terrain.
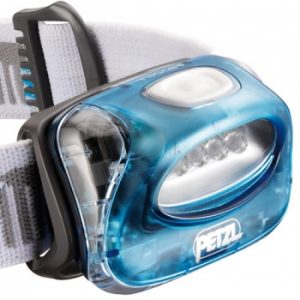
The Petzl is ultra small and ultra light with great battery life. It is not so good for scouting, hiking, etc.
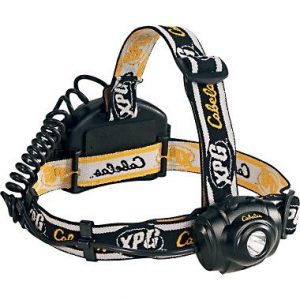
The XPG is ultra Bright and great for Hiking, Tracking, Quartering, etc.
Response from Corey Jacobsen –
Like Donnie mentioned, keeping your bivy camp scent free will help keep the bears away. We had a bear in camp last weekend while we were up scouting…we had gotten careless and left some food wrappers laying outside the tent, not in the sealed bags.
Regarding the 1 Liter water bottles, that is exactly what I carry along with a water filtration bottle by Urban Pipeline. As you drink the 1 Liter bottle down, you can squeeze the air out before twisting the cap back on and that will eliminate the water sloshing and noise.
Season opens in less than a week! We can’t wait to see and hear all about your hunt! Good luck, and be safe!
FINAL STOP – ELK101.com’s EXTREME ELK HUNTING CLASS!
Monday morning found me firing up the ol’ diesel and getting ready for a road trip. I was making the drive to see Corey and the boys at Elk 101.com in Boise, Idaho. No big deal, just a ten hour-plus trip each way to meet the guys and get some first hand elk killing info. I mean “why not?” If you’re gonna do it, might as well do it right, eh?
Trip was going well and I was making good time until I hit Reno. If you’re not familiar with Reno let me tell ya the pit falls. There are three. No, not gambling and showgirls and racing but the other big three: Cabela’s, Sportsman’s Warehouse and Scheels!!! Needless to say my trip time was thrown off. Then again, when crossing the time line from Pacific to Mountain time zone – I hadn’t factored that in to my plans. I arrived at the Jacobsen’s much later than expected but my host couldn’t have been more gracious.
The seminar at Cabela’s Boise was set up and I was getting ready to do a little lite shopping for some”necessities” when people started to check in for the show. I checked my watch and thought to my self “these guys are hard core getting their seats so early. There’s still an hour and a half to shop.” Ya, that would be strike two for the time change thing.
The seminar kicked off and the crew at Elk 101 had full attention of the packed crowd. All seats but one were full, but that guy decided to stand as he was late. (Musta had that same time problem I was having). I will tell you this – I wasn’t, and you wont be disappointed if you can attend one of these classes. Video footage was amazing, the calling is, well, Jacobsen level calling, and the info was all there. I walked away feeling, no KNOWING, I was going to kill an elk this year. In fact, I was mid way into the seminar wondering what info these guys keep for themselves. Tricks of the trade if you will. Its all here for the asking. Don’t miss it. I also walked away with a nice door prize and swag from the Elk 101.com gift bags.
I was fortunate to meet other Elk 101 staffers Donnie and Jody, and a few of the crew’s friends that attended, noting that all were very friendly and helpful in my quest for my first bull.
Wednesday morning found the ol’ grease burner alive and rattling down the freeway tearing up the miles towards home. I was squawking and bugling my brains out for hours and hours. That much closer to my backcountry bull.
I’d like to thank the guys at Elk 101.com for a great time and the Jacobsen family for being such a great host and Sheppard of wayward souls. I hope to see you again soon to return the hospitality.
Thank you,
Rookie Elk Hunter (AKA Paul Beyer)

