“Love at First Sight”
 With spring right around the corner it is time to start thinking about sighting or re-sighting that bow in. Many bow hunters tuck their bows away after season while others continue to shoot all winter during indoor leagues, Vegas rounds, etc. Additionally, I am sure some of you are probably like me and change equipment every so often to better suit you needs.
Whether you are buying a New Hoyt Carbon Element (mine should be here before you read this), a new sight, a new arrow rest, or switching arrows and/or broad heads, you’ll need to sight or re-sight your bow in. Some of you may remember the article I wrote last year “Sighting in with a Line and a Graph”. This year I would like to not only reiterate using a line to sight in, but also add a new tool for you to use.
A few months ago I was browsing the internet and came across a web site called www.TheArcheryProgram.com. Not being a computer whiz, I called TAP’s owner Tony Virnoche for a personal run down on the programs he has to offer. After a short conversation with Tony, I knew I needed to not only inform the Elk101 community of his unbelievably easy to use sighting-in programs, but also purchase one for myself. Not being a Slide sight shooter any longer, I decided to purchase the “TAPes” program he offers for $15.00 and give it a shot. For those of you that are both slide sight shooters and pin sight hunters, I encourage you to look at the “TAP pro”.
I am still amazed at how easy it is to download and use. By following the step-by-step instructions I had a new sight graph for my Hoyt Maxis 35 in a matter of minutes. (It probably would have been less than a minute if I would have watched the Demo first).
Here are the basic steps of the program:
Step 1 – Print Scale.
Step 2 – Cut out the scale. .
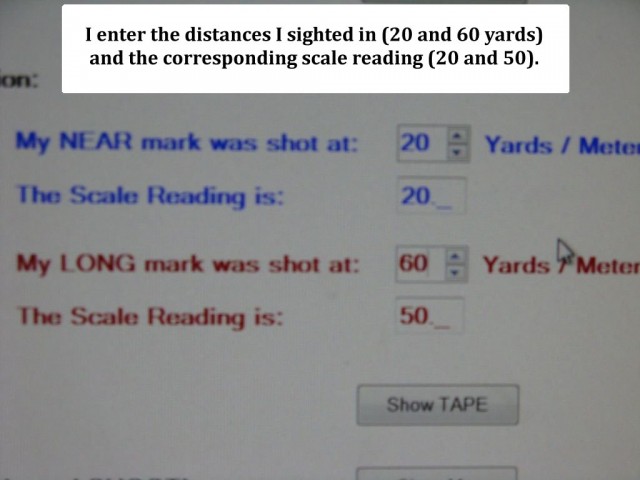
Step 3 – Sight in two marks. I used 20 and 60 yards and found the corresponding numbers on the Scale
Step 4 – Enter the Near and Far marks into the program along with their corresponding numbers from the Scale.

Step 5 – View your sight tape/graph.
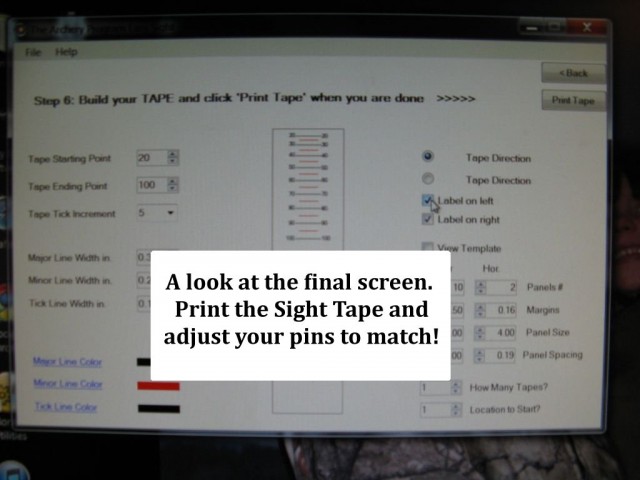
Step 6 – Build your sight tape/graph by changing various line width, colors, etc. Personally, I just hit print on the first one and used the defaults.

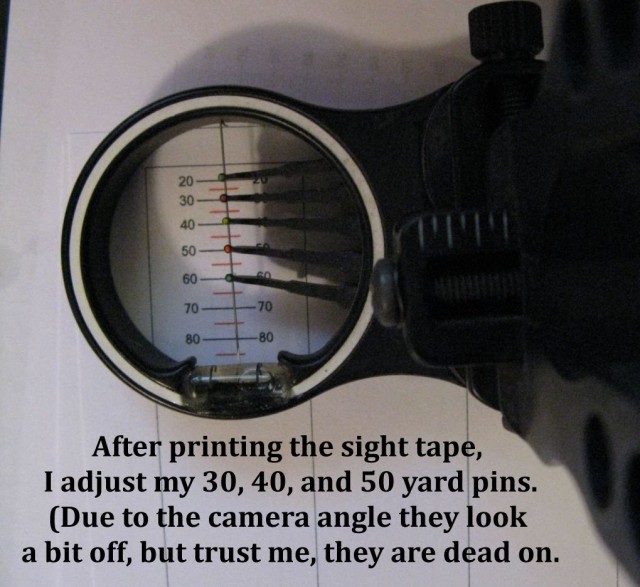
Step 7 – Adjust the other pins to line up with your desired yards. For me that was my 30, 40, and 50 yard pins. I also found that my bubble was dead on at 85 yards and the bottom of my pin guard was pretty dang close at 100 yards, neither of which are practical yardages for bow hunting elk, but sure are fun to practice at!

After I had my sight tape completed and verified I laminated it and placed it into my pack for future reference. You never know when you may bump or break a pin in the back country and need a quick reference. By having a laminated sight graph that is custom made for your bow, it can add a sense of security knowing you have a way to double check the individual sight pins while in the field.
I hope all off you take a look at www.thearcheryprogram.com. I know it has changed how I will sight in my bows in the future and let’s face it – taking “Quality” short cuts to allow us to concentrate on other aspects of Elk hunting is always a good thing! “Is it September Yet?”

